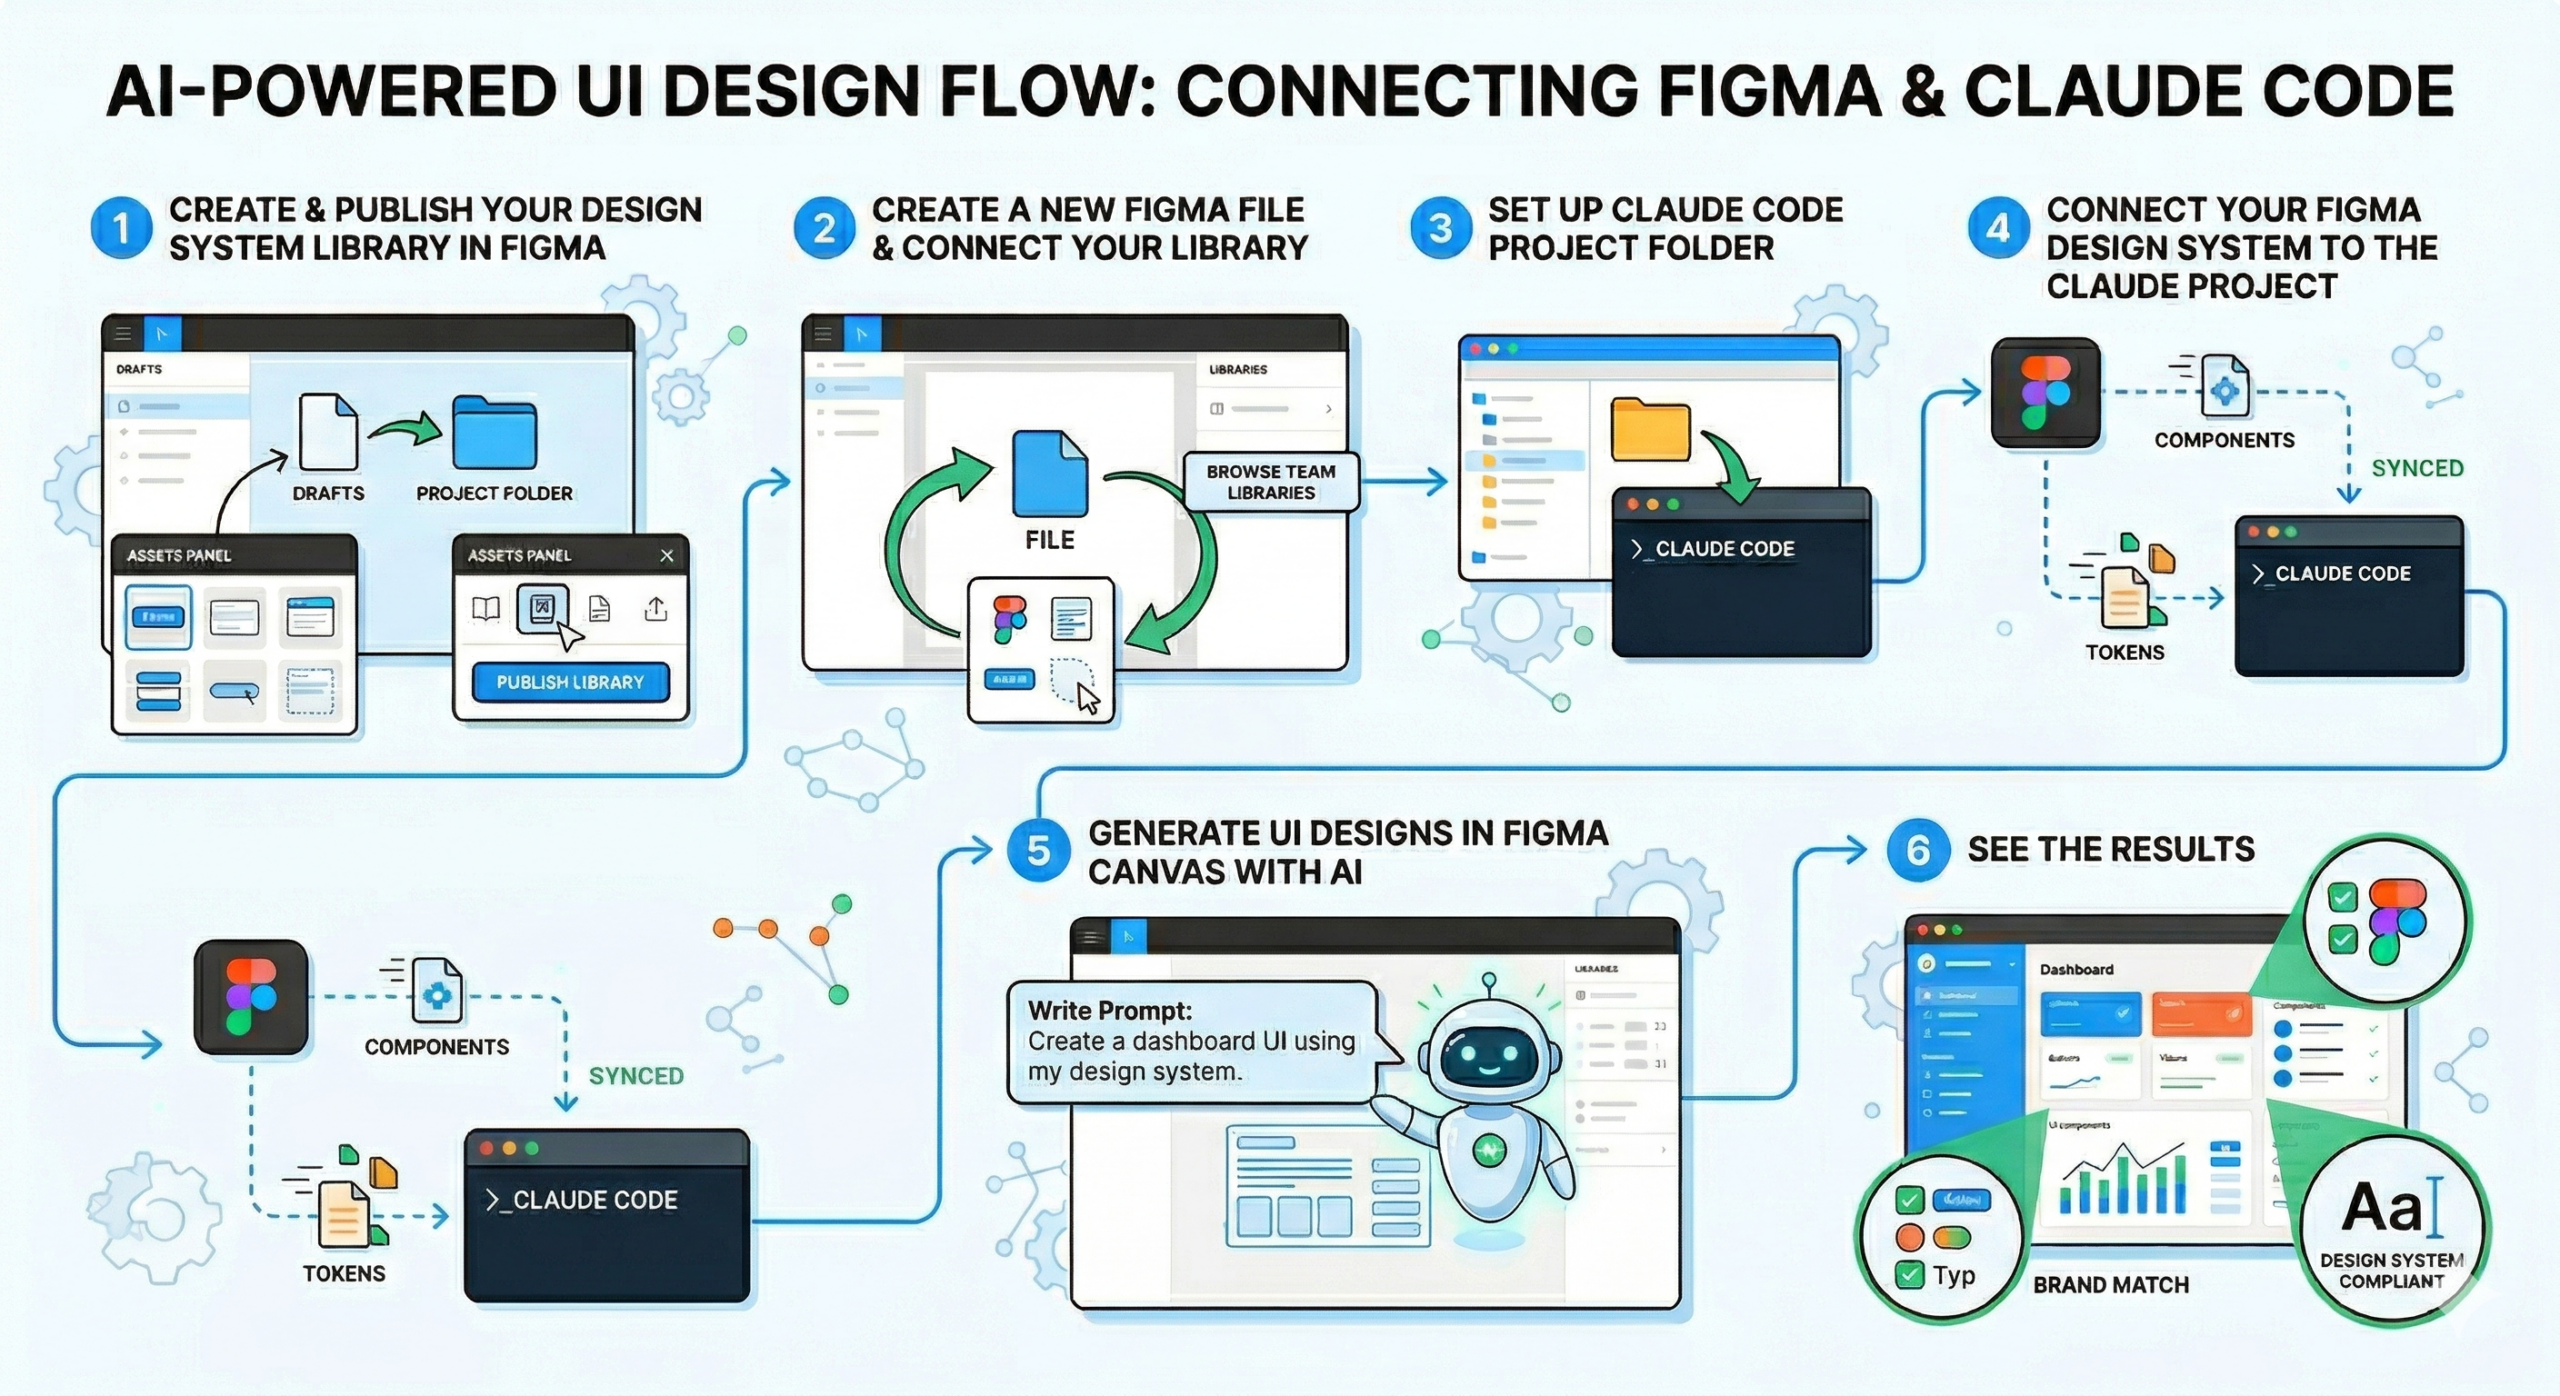
Create & Publish Your Design System Library in Figma
Go to Figma Community → Filters → Design Resources → UI Kits.
Pick a simple design system (or use your own).
Open it → Duplicate to your drafts.
Important: Move the file out of drafts into a real project folder.
Open the file → Assets panel → Click the book icon (Libraries).
Publish the library so other files can use it.
Create a New Figma File & Connect Your Library
Create a brand-new design file.
Assets panel → Click Libraries icon or “Browse team libraries”.
Find and add your published design system.
Now you can drag components from the library into your canvas.
Set Up Claude Code Project Folder
On your computer, create a completely empty folder for the project.
Open Claude Code (or Claude desktop + terminal) inside that folder (don’t launch it from desktop).
This folder will hold all generated files and code.
Connect Your Figma Design System to the Claude Project
Link the published Figma library to your Claude Code project (exact clicks shown in video).
Claude now “knows” your components, colors, styles, and tokens.
Generate UI Designs in Figma Canvas with AI
In Figma, use the new AI agent (powered by Claude).
Write a prompt describing the UI you want.
The AI generates full layouts using your exact design system components (no more fixing generic AI output).
See the Results
Review the AI-generated designs — they already match your brand/styles.